Cleaning a cat’s ears at home can sound a little intimidating at first, but with a gentle hand and the right approach, it’s actually pretty straightforward. A lot of folks avoid it because they think it’ll turn into a wrestling match filled with hissing and drama. The truth is, when you focus on calming your cat, reading their cues, and using a few distraction tricks, it usually goes a lot smoother and without any fuss.
Keeping your cat’s ears clean isn’t just about good looks. Healthy ears can help prevent infections and keep your kitty feeling comfortable. In this guide, I’m breaking down easy steps, pro tips, and what to watch for, so you can tackle ear cleaning with total confidence even if you’ve never tried before. Plus, you’ll find out why ear care matters not just for comfort but also for your cat’s overall health.
Why Cat Ear Cleaning Matters
Sure, cats are known for grooming themselves, but their ears are one spot they can’t reach properly. Dirt, wax, or even a stray bit of litter can build up inside. For most healthy cats, a regular check and gentle clean here and there is all it takes to keep their ears problem free. If you leave it too long, that dirty buildup can lead to itching, ear infections, or even hearing issues down the road. Over time, chronic problems may result in changes to your cat’s behavior. They could end up less social, withdrawn, or grumpy from discomfort, so keeping ears clean isn’t only about hygiene, but also about your kitty’s well-being and happiness.
Some signs that your cat’s ears might need attention include head shaking, scratching at their ears, or a little dark gunk visible inside. If you notice an odor or your cat avoiding head pats, it’s a clue to check things out. A little monthly maintenance can keep things simple and stress-free, and catching issues early can make treatment a whole lot easier if you ever need it.
Getting to Know Cat Body Language
Reading how your cat feels is pretty important, especially when you’re asking them to trust you with something new. Look out for these signals:
- Relaxed ears: Held upright and facing forward or just slightly to the side. Your cat is relaxed and open to attention.
- Pinned back ears: Flattened against the head means your cat’s a little nervous or annoyed.
- Tail and body: A loose tail and relaxed body are good signs. If the tail is whipping or your cat is tense, take a break or slow down.
Respecting your cat’s boundaries isn’t just polite. It also keeps things calm and safe for both of you. If you learn to pick up on what your cat’s body is saying, you’ll avoid meltdowns and keep the routine positive.
Prepping for the Ear Cleaning Session
Cleaning cat ears is always easier with a little prep work. Here’s a quick checklist:
- Gather your supplies: You’ll need a vet approved ear cleaner, some soft cotton pads, and a handful of your cat’s favorite treats.
- Set the stage: Choose a quiet, comfy spot where your cat feels safe. A towel on your lap can help them stay in place (and save your clothes from any sudden wiggles).
- Go for low key lighting and soft voices: Cats usually relax more when the vibe is chill and quiet.
Before starting, wash your hands to make sure things stay clean. Having everything within arm’s reach will help the process go faster and avoid you having to get up midway and leave your cat waiting.
Distraction Tricks That Actually Work
If your cat is squirmy or anxious, keeping their mind elsewhere is a game changer. Here are some ways to turn ear cleaning into a positive experience:
- Treats: Holding out a treat or two during the process keeps things positive. You can even smear a little lickable treat on a plate for your cat to focus on while you work.
- Brushing: A gentle brush along their back first helps relax many cats. Start by brushing, and once your kitty’s in a mellow mood, slowly work up to their ears.
- Calm talking: Chatting quietly to your cat or giving them gentle praise can make a bigger difference than you’d think.
You can also use a favorite blanket or cat bed to offer extra comfort, or try clicker training to reward any cooperative behavior. Keeping the vibe chill means your cat is less likely to get stressed, and you’re more likely to clean both ears without any drama. These distraction tips also help your cat view ear cleaning as a time for snacks and bonding, not something to dread.
The Step by Step Cat Ear Cleaning Routine
Here’s how I handle ear cleaning for my own cat, breaking it down into super simple steps:
- Time your session: Choose a time when your cat’s naturally relaxed, like after a meal or a nice play session. If your cat is sleepy, even better.
- Start slow: Let your cat sniff the supplies, give them a cheek scratch or treat, and begin by gently touching their ear.
- Lifting the ear: Gently fold back the ear flap so you can see inside. Don’t force it, just go as far as your cat feels comfortable.
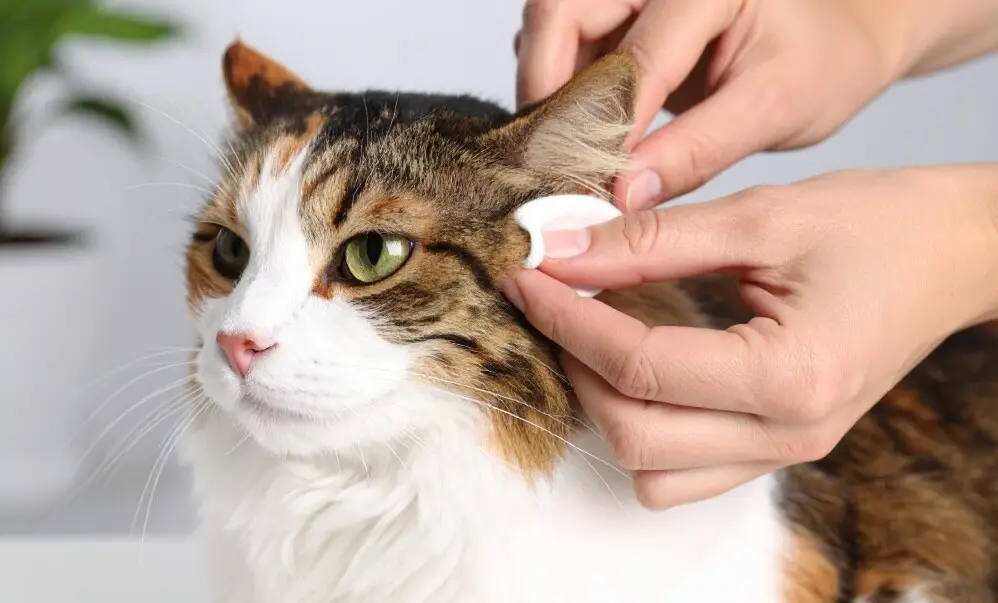
- Apply cleaner to a cotton pad: Never squirt cleaner directly into your cat’s ear unless your vet specifically instructs you. Dampen a cotton pad and gently wipe the visible part of the inner ear (staying out of the canal itself).
- Wipe gently: Use a fresh pad for each ear, and avoid cotton swabs. They can push debris further in or hurt your cat’s ear.
- Watch for stress signals: If your cat becomes restless, stop for a moment or try again later. You can break it into two short sessions if needed.
- End on a happy note: Give a treat, extra petting, or a favorite toy to make ear cleaning something your cat doesn’t dread.
If a lot of wax or gunk comes out on the pad, check in with your vet. It might be a sign that something more serious is going on, and a vet can give you better guidance.
Tips to Keep Yourself (and Your Cat) Calm
- Take a deep breath before you start. Cats pick up on tension and will be much calmer if you are, too.
- Turn on some soothing background music or keep the atmosphere relaxed and quiet.
- Don’t rush, slow, steady movements are way less scary for cats than quick or jerky ones.
It sometimes helps to remember you don’t need to get both ears perfectly clean on your very first try. Progress matters more than perfection. If today only gets one ear done, that’s better than forcing it and stressing your cat out. With time and consistency, your cat will start to accept this as part of their routine.
How Often Should You Clean Your Cat‘s Ears?
If your cat has healthy, clean ears most of the time, you probably only need to spot clean once a month or so. Some breeds (like Scottish Folds or Persians) may need a bit more attention, especially if they’re prone to wax or dirt. If your cat has a history of ear issues, or if your vet suggests it, your cleaning routine may be different. Always talk with your vet if you’re unsure as frequent ear cleaning is not usually needed unless there’s a specific medical reason. Over cleaning can cause irritation, so strike a balance for your individual cat’s needs.
When to Call Your Vet
Sometimes, a little cleaning at home isn’t enough. Give your vet a call if you notice:
- Redness, swelling, or discharge that smells strong
- Lots of head shaking, ear scratching, or pawing at the ear
- Black, brown, or yellow buildup that returns quickly
- An obvious injury or anything that just looks off
A vet can tell if it’s an infection, allergy, or mites, and give you the best care plan. Never use home remedies or over the counter drops without checking in first; they can sometimes do more harm than good. Your vet may also be able to show you the best way to safely clean your particular cat’s ears.
Quick Reference: Easiest Cat Ear Cleaning Supplies
- Vet approved ear cleaning solution
- Soft cotton pads (not swabs)
- Treats or lickable paste
- Soft towel
- Optional: soft brush for relaxing your cat
You can usually find these supplies at your local pet store or vet’s office. Always check the ingredients and ask your vet if you’re unsure about a product. Avoid harsh chemicals, fragrance, or alcohol-based cleaners, as these can irritate delicate cat ears.
Common Questions and Troubleshooting
My cat hates having her ears touched. What do I do?
Start slow and reward every tiny bit of progress. Pet your cat’s head, then work up to touching her ear for a second or two during cuddle sessions. Build trust with lots of treats and patience. If you keep at it, many cats come around after a while.
Is it normal for my cat’s ears to have a little wax?
Yes. Just a bit of light wax is totally normal. If there’s a lot, or it looks dark and gunky, it’s worth asking your vet. Mild debris may be okay, but heavy buildup calls for a closer look.
Do I really need special cleaner?
It’s always safest to use a product made for cats. Human products or random household liquids can hurt your cat’s ear. When in doubt, stick to what your vet recommends.
Easy Ear Care Routine Recap
- Watch for relaxed body language before you start.
- Keep things calm with treats, brushing, and soft voices.
- Start slow and praise all progress.
- Stick with gentle, vet recommended supplies and avoid cotton swabs.
- Check in with your vet about anything unusual.
It gets easier with practice. Your cat may even come to enjoy the attention. Calm energy, rewards, and patience make all the difference. Got tips or favorite treats that keep your cat happy during ear cleaning? I’d love to hear about it! Remember, making ear care positive and stress free will go a long way in keeping your kitty happy and healthy for years to come.